towell@sztuowei.com


How to Evaluate CNC Machining Factories: A Comprehensive Guide
how to smooth pla 3d prints
by:Tuowei
2019-09-08
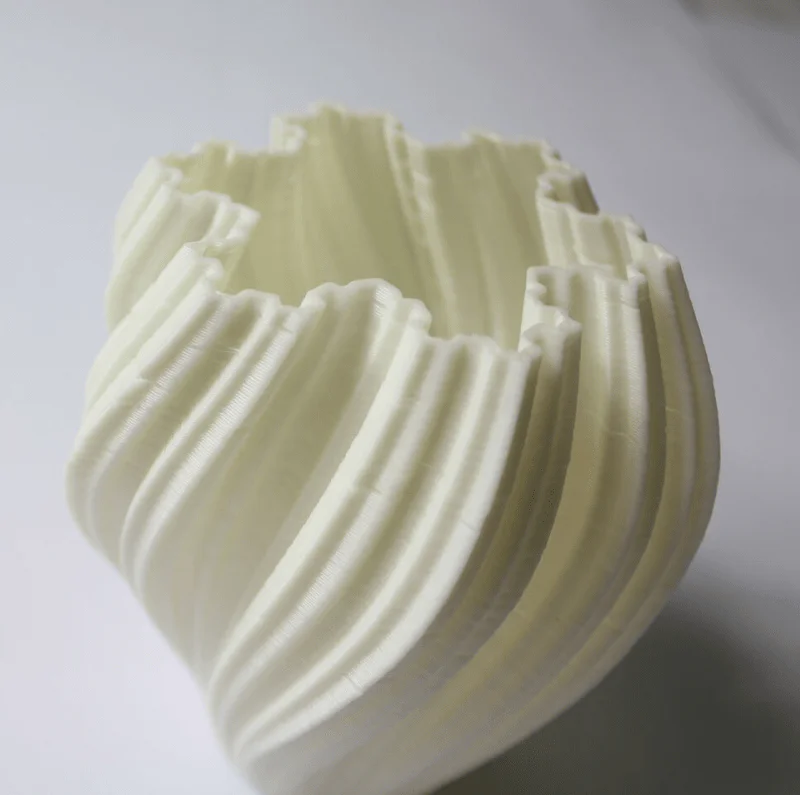
In this Instructure, I will show you how I can smooth PLA 3D printing in four different ways.
Thanks to the instructures in 2013, my life as a manufacturer has changed a lot.
That year I won my first 3D printer with my Nerf sentry gun instructions.
You can\'t imagine how nervous I was, waiting for the announcement of the winner.
The 3D printer is what I want most, but I can\'t afford it (
Makerbot Replicator was $2000 at the time).
If you look at my work over the last few years, you will find that 3D printing is one of my favorite things.
It took me thousands of hours to see my thoughts come true and I\'m sure I\'ll never get tired of it.
Because my passion is contagious, a lot of my friends bought 3D printers or asked me to print things for them (
Things I like to do).
Now the question I\'m asked the most is: \"How do you make your photos look so smooth? \". I (
Like most people.
Printing mainly in PLA, although ABS is easy to smooth, PLA is a bit tricky.
So even though there\'s almost always a step on my structures to show you how I\'m doing and drawing a project safe for a while
There is no perfect way to smooth the PLA as there are a lot of things to consider.
For example, the size of your model, the number of details, whether there are hard-to-reach areas, the preservation of the original color, or how much time you want to spend.
The table below shows four of my favorite ways to smooth PLA 3D printing.
There are other ways like using a hot gun, but since these methods don\'t work well for me, I didn\'t include them in the list.
Obviously you just need to Polish and Polish. e. g.
Metal polishing)
This part, but it will take a lot of effort and be tricky if your printing is complicated.
Let me know if you have a method that you think works, and I have been looking for improvements.
Here, here and here are three notes from other members that you may find helpful.
In order to show you how the different methods work, I decided to take part in everyone\'s favorite torture test: 3d benchy.
It is printed at Level 0. 2 mm (
I usually go to 0. 15 or 0.
Large 2mm).
Since this is a fairly small part, I usually use solvent smoothing, but I decided to show you each process with the same model.
My Ultimaker 2 extends all 3d benchys and I use Simplify3D as a slicer.
I have also included some images that I have failed in the past so that you have hope to learn from them.
If you are interested, here are some items that I smooth after printing: there are still some on my instructures pages, please feel free to check them out.
As you can see, I use different methods for different projects.
Sometimes I even use different methods on a project.
Remove all support structures before you start, and if your model is made up of multiple parts, stick them together.
Remove all minor flaws, such as oozing, using a surgical knife.
Now begin to fill in the bigger flaws and loopholes.
I use body filling (e. g. from amazon).
I hear people like to use wood fillers.
Personally, I prefer to use body filler because, in my experience, it is more suitable for PLA because it consists of two parts so you can use a thicker layer.
Also, it doesn\'t shrink too much, which means you usually do it at once.
After that, you have to polish the area you just filled.
You should have 320 courage at this stage.
Do not use an electric sander because it can get hot and the PLA will start melting.
Tip: It\'s always better to keep the spray upright.
So unless my model is really big, I use blu tack and stick it to the handle (
An old Hammer)
This way I can easily spray paint from all aspects.
The most important thing to remember is to spray in a thin layer.
Use a filling Primer (e. g. this one).
Let it dry properly before spraying another layer.
I usually use two to three layers before first sanding.
You can also use a plastic putty instead of a primer filler.
Make sure your work area is clean and well ventilated and read the instructions on the spray tank so you know what temperature range the spray tank works best.
Depending on how smooth you want your model to be, you don\'t even need to polish it because the filling primer is already very effective.
Tip: I found one of the best tips to get a nice, even and smooth result is wet sand.
You have to get the right type of sandpaper (e. g.
This collection).
Simply put it in the water for about 15 minutes to get it wet and then check the parts with it.
I was told that it would work better if you put sandpaper in the water for the night, but so far I haven\'t found it necessary.
By immersing the sandpaper in the water from time to time, make sure the sandpaper remains moist and the dust does not start to clog.
Adding a little soap to the water helps to lubricate the surface, prevent the sandpaper from clogging, and help the particles to rinse the surface more freely.
I usually stack the paper on myself and make a thick piece to keep.
Obviously you can also use a sanding sponge.
I usually use 400 or 600 sandpaper at this stage.
I have been told that you should not wear sand through the primer, especially if the primer is applied to the wood, but I find it doesn\'t matter to use PLA (
Unless you don\'t want to use another primer afterwards).
After polishing, clean the model and let it dry (
Do not use a hair dryer unless you are very careful).
Now you can decide whether you want to use another layer of filling primer and sand again before you start painting, or another primer with a thinner consistency.
I like the basics of Army Painters (e. g. from amazon)
Because it has different colors, it is sprayed very well, even evenly, and works very well with acrylic paint.
In my experience, the black primer formula P3 (e. g. here)
Good too.
Back in 2013, when I started trying to find a way to smooth the PLA 3D printing, there was not much information around.
Since I didn\'t want to blindly trust the few online suggestions I could find, I decided to do some research and find this paper.
It compares the solubility of PLA in different chemicals and gives information on whether the use of a certain chemical can cause expansion.
In general, this study shows that quite a few solvents will work. E. g.
Chlorhexidine ethyl acetate, thiofans, chloride, triclomethane, and acetone.
Self-fluoride ether (THF)
Easy to get for me, the boiling point is relatively low compared to other low-risk chemicals (
At that time, please take a look at the next steps and see what I mean)
I decided to go with it.
Keep in mind that different PLA filament brands may perform differently because you will never get the filament of pure PLA.
Many additives, such as softener, are usually added.
THF has long been my favorite way to smooth PLA 3D printing.
However, since 2017, it has been listed as \"carcinogenic substances in experimental animals \"(source)
I decided to use it less and look for a replacement.
As you can see in the picture above, when I got the bottle it was not labeled \"GHS08: health hazard.
After the unified classification and labeling system for global chemicals, it is classified as \"H351: suspected cancer-causing \".
Like all other effective solvents, it is also classified as \"H225: highly flammable liquids and steam\" and irritating.
If you are interested, here is a list of all physical and health hazards (
Find out what they mean here)
: H: 225-302-319-351p: 210-312 30-351 338-370 235 ensure that all hazards are read and at your own risk.
GESTIS substances database is a very good source to learn more about chemicals.
Since THF is such a large solvent, most gloves are useless and it will eat them directly.
We recommend Nover gloves, but it\'s hard to get them.
Polyethylene acetate (PVA)
Provide some limited protection (up to 1 -
Some gloves for 1/2 hours)(source).
I used the pva gloves while dealing with the THF.
Also, be sure to wear safety goggles.
Another thing you have to pay attention to when using THF is storage.
As the evil chemist points out in his comments on contact with light and air, explosive peroxide may form.
Be sure to put it in a closed brown glass bottle away from the light.
If you are worried about peroxide, you may consider buying the peroxide test strip.
Do not evaporate or distill it (
Especially in closed systems)
Unless you have tested it.
Make sure to work in a well ventilated area and there is nothing nearby that could cause a fire.
In general, as you can see above, you have to decide whether a smooth part is worth taking risks.
As stated in the last step, I started looking for alternatives after THF was classified as suspicious cancer.
I have seen a few web pages that say that nesroform is very effective for the smooth operation of the PLA, but since it is illegal as a private purchase in most countries, it\'s like being classified as \"H351\" I would recommend not to use it because it\'s suspected to cause cancer and it\'s \"H331: inhaled toxic \".
So I started using acetate and found it worked really well.
It is usually used in glue and nail polish detergent.
That\'s why nail polish works well in other instructions.
Like THF, ethyl is a highly flammable liquid.
It also produces slight irritation to the eyes and airway, showing that the central nervous system is disturbed (Anesthesia effect)
And damage the lungs at high concentrations.
So make sure you have good ventilation in the work area.
The steam/air mixture is heavier than the air.
Adequate ventilation must be ensured in the floor area.
Use protective gloves.
I used Ding glue.
It will be eaten directly through latex or Ding Qing gloves, so these are not enough.
Also wear eye protection.
There are two different ways to smooth with solvent.
Personally, most of the time I just wipe the parts with a cloth.
Even if I plan to use the starter book later, I do so often.
As you can see in the picture, the PLA will start to stick to the fabric, so use a cheap fabric that you don\'t mind throwing away (e. g. these).
You can use Q-
Tips for areas that are more difficult to reach.
You have to use some stress in order to get a good result.
Just add a small amount of solvent to the fabric and wipe the parts with it.
After drying, add more solvents and start again.
Using a solvent is faster than triggering and sanding, but in order for it to work properly, the parts must be very smooth from the beginning.
I have not succeeded in smoothing the PLA with acetate vapor so far, but I decided to share my findings here.
The steam pressure of ethanol is 9.
7 kPa at 20 °c, which means that at 20 °c (68°F)
About 10% of the gas phase is composed of acetate.
You can see the visualization of steam pressure in the first picture.
During the test, my store temperature was around 15 °c and even leaving a few hours of prints in steam didn\'t work.
If you use acetone (
This works well for ABS but sadly not for most PLA brands)
At 20 °c, about 25% of the gas phase already consists of it.
In order to achieve a higher concentration, you must either raise the temperature or reduce the pressure.
As you can see in the second picture, I decided to start by raising the temperature.
I tried a different temperature between 40 °c (104°F)to 60°C (140°F)
And placed in the steam for two hours.
Unfortunately, there is no effect.
As you can see in the third picture, before the top starts to smooth, the base bottom starts to deform.
The next thing I try is to relieve stress.
In this case, ethanol begins to dissolve the container (
You can see it turned white in the fourth picture)
Although it is considered to be made of polyethylene.
I have no further experiments at this point, but please let me know your findings if you have a better vacuum chamber.
I never thought about using epoxy before XTC 3D started selling.
So I decided to give it a try.
I like to work with it, but unfortunately it is really expensive in Germany.
I tested it further and found that any other epoxy can work as well.
Please read all safety instructions before using epoxy!
Hardening agent of XTC-
For example, 3D is marked as \"H361: a child suspected of harming fertility or an unborn child \".
That\'s another reason why I\'m using different brands now.
Be sure to wear Ding nitrile gloves when using epoxy!
Harmful substances like ethylenoxide can spread through latex gloves and you absolutely don\'t want them on your skin!
Also, be sure to wear safety goggles.
The epoxy resin consists of two parts: an unreactive epoxy resin and a hardened or curing agent.
You have to mix these two ingredients together.
The correct proportions depend on the epoxy you use, so be sure to read the instructions.
The curing time of the epoxy resin you use is also different.
Either way epoxy always ensures full mixing.
Paint brushes can be cleaned with acetone but are messy so I recommend using a disposable brush.
I like to brush with foam (e. g.
They will be cheaper if you buy them in bigger bags).
Sadly, Q-in my experience-
Tips don\'t work very well.
After a bit of trial and error, I found that the disposable lip brush worked very well (e. g. these).
All you have to do is carefully apply the epoxy to a thin layer on 3D printing.
Like painting, I stick it to my handle with blu tack.
Let the epoxy cure for at least 24 hours.
Once dry, you can keep it as it is, polish it, or apply a layer of epoxy.
This reaction is to release heat, which means that heat is generated.
Especially in your mixing cup.
Therefore, do not use very narrow, high containers, otherwise it may lead to a reaction that is out of control.
This also means that due to the heat generated by epoxy in the Cup, the curing speed will be faster than that on the model.
So please don\'t touch the model just because the epoxy is cured in your cup.
Personally, I am not a big fan of polishing epoxy.
If I really want the perfect finish and since I usually always paint my parts, I usually apply a layer of epoxy and then let it dry and use the fill primer as the second layer.
Tip: After seeing the instructions and already having a sand blasting machine, I decided to give it a try.
For sandblasting, I use a mixture of silica and alumina as a sandblasting abrasive with a particle size of 0. 2 to 0.
Pressure of 5mm and 8 bars (116 psi).
To be honest, I rarely use sand blasting to smooth 3D printing, because although it works, it mainly makes the part look smoother because it becomes matte, but, if you paint after that, you can see that the lines are still visible.
Also, as you can see, if you have a lighter part, you should not use the same mixture as me because it will stain the part.
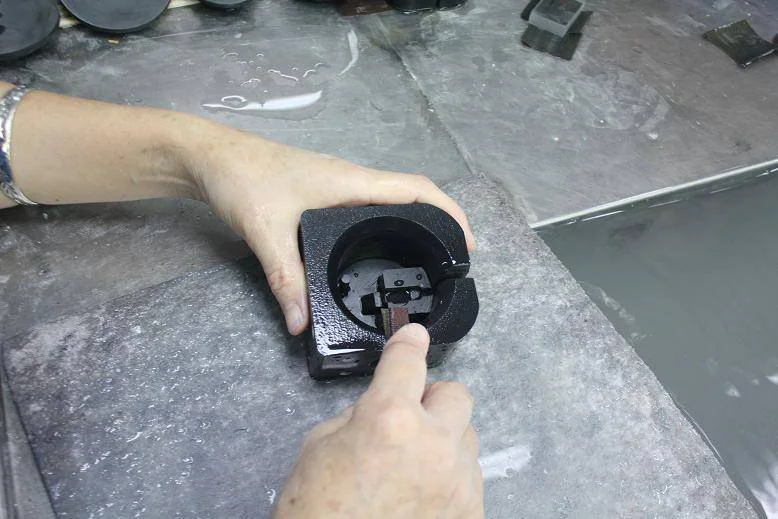
Still, if you have a part that is deeply indented, like the one shown in the third picture, it works very well.
Thanks to the instructures in 2013, my life as a manufacturer has changed a lot.
That year I won my first 3D printer with my Nerf sentry gun instructions.
You can\'t imagine how nervous I was, waiting for the announcement of the winner.
The 3D printer is what I want most, but I can\'t afford it (
Makerbot Replicator was $2000 at the time).
If you look at my work over the last few years, you will find that 3D printing is one of my favorite things.
It took me thousands of hours to see my thoughts come true and I\'m sure I\'ll never get tired of it.
Because my passion is contagious, a lot of my friends bought 3D printers or asked me to print things for them (
Things I like to do).
Now the question I\'m asked the most is: \"How do you make your photos look so smooth? \". I (
Like most people.
Printing mainly in PLA, although ABS is easy to smooth, PLA is a bit tricky.
So even though there\'s almost always a step on my structures to show you how I\'m doing and drawing a project safe for a while
There is no perfect way to smooth the PLA as there are a lot of things to consider.
For example, the size of your model, the number of details, whether there are hard-to-reach areas, the preservation of the original color, or how much time you want to spend.
The table below shows four of my favorite ways to smooth PLA 3D printing.
There are other ways like using a hot gun, but since these methods don\'t work well for me, I didn\'t include them in the list.
Obviously you just need to Polish and Polish. e. g.
Metal polishing)
This part, but it will take a lot of effort and be tricky if your printing is complicated.
Let me know if you have a method that you think works, and I have been looking for improvements.
Here, here and here are three notes from other members that you may find helpful.
In order to show you how the different methods work, I decided to take part in everyone\'s favorite torture test: 3d benchy.
It is printed at Level 0. 2 mm (
I usually go to 0. 15 or 0.
Large 2mm).
Since this is a fairly small part, I usually use solvent smoothing, but I decided to show you each process with the same model.
My Ultimaker 2 extends all 3d benchys and I use Simplify3D as a slicer.
I have also included some images that I have failed in the past so that you have hope to learn from them.
If you are interested, here are some items that I smooth after printing: there are still some on my instructures pages, please feel free to check them out.
As you can see, I use different methods for different projects.
Sometimes I even use different methods on a project.
Remove all support structures before you start, and if your model is made up of multiple parts, stick them together.
Remove all minor flaws, such as oozing, using a surgical knife.
Now begin to fill in the bigger flaws and loopholes.
I use body filling (e. g. from amazon).
I hear people like to use wood fillers.
Personally, I prefer to use body filler because, in my experience, it is more suitable for PLA because it consists of two parts so you can use a thicker layer.
Also, it doesn\'t shrink too much, which means you usually do it at once.
After that, you have to polish the area you just filled.
You should have 320 courage at this stage.
Do not use an electric sander because it can get hot and the PLA will start melting.
Tip: It\'s always better to keep the spray upright.
So unless my model is really big, I use blu tack and stick it to the handle (
An old Hammer)
This way I can easily spray paint from all aspects.
The most important thing to remember is to spray in a thin layer.
Use a filling Primer (e. g. this one).
Let it dry properly before spraying another layer.
I usually use two to three layers before first sanding.
You can also use a plastic putty instead of a primer filler.
Make sure your work area is clean and well ventilated and read the instructions on the spray tank so you know what temperature range the spray tank works best.
Depending on how smooth you want your model to be, you don\'t even need to polish it because the filling primer is already very effective.
Tip: I found one of the best tips to get a nice, even and smooth result is wet sand.
You have to get the right type of sandpaper (e. g.
This collection).
Simply put it in the water for about 15 minutes to get it wet and then check the parts with it.
I was told that it would work better if you put sandpaper in the water for the night, but so far I haven\'t found it necessary.
By immersing the sandpaper in the water from time to time, make sure the sandpaper remains moist and the dust does not start to clog.
Adding a little soap to the water helps to lubricate the surface, prevent the sandpaper from clogging, and help the particles to rinse the surface more freely.
I usually stack the paper on myself and make a thick piece to keep.
Obviously you can also use a sanding sponge.
I usually use 400 or 600 sandpaper at this stage.
I have been told that you should not wear sand through the primer, especially if the primer is applied to the wood, but I find it doesn\'t matter to use PLA (
Unless you don\'t want to use another primer afterwards).
After polishing, clean the model and let it dry (
Do not use a hair dryer unless you are very careful).
Now you can decide whether you want to use another layer of filling primer and sand again before you start painting, or another primer with a thinner consistency.
I like the basics of Army Painters (e. g. from amazon)
Because it has different colors, it is sprayed very well, even evenly, and works very well with acrylic paint.
In my experience, the black primer formula P3 (e. g. here)
Good too.
Back in 2013, when I started trying to find a way to smooth the PLA 3D printing, there was not much information around.
Since I didn\'t want to blindly trust the few online suggestions I could find, I decided to do some research and find this paper.
It compares the solubility of PLA in different chemicals and gives information on whether the use of a certain chemical can cause expansion.
In general, this study shows that quite a few solvents will work. E. g.
Chlorhexidine ethyl acetate, thiofans, chloride, triclomethane, and acetone.
Self-fluoride ether (THF)
Easy to get for me, the boiling point is relatively low compared to other low-risk chemicals (
At that time, please take a look at the next steps and see what I mean)
I decided to go with it.
Keep in mind that different PLA filament brands may perform differently because you will never get the filament of pure PLA.
Many additives, such as softener, are usually added.
THF has long been my favorite way to smooth PLA 3D printing.
However, since 2017, it has been listed as \"carcinogenic substances in experimental animals \"(source)
I decided to use it less and look for a replacement.
As you can see in the picture above, when I got the bottle it was not labeled \"GHS08: health hazard.
After the unified classification and labeling system for global chemicals, it is classified as \"H351: suspected cancer-causing \".
Like all other effective solvents, it is also classified as \"H225: highly flammable liquids and steam\" and irritating.
If you are interested, here is a list of all physical and health hazards (
Find out what they mean here)
: H: 225-302-319-351p: 210-312 30-351 338-370 235 ensure that all hazards are read and at your own risk.
GESTIS substances database is a very good source to learn more about chemicals.
Since THF is such a large solvent, most gloves are useless and it will eat them directly.
We recommend Nover gloves, but it\'s hard to get them.
Polyethylene acetate (PVA)
Provide some limited protection (up to 1 -
Some gloves for 1/2 hours)(source).
I used the pva gloves while dealing with the THF.
Also, be sure to wear safety goggles.
Another thing you have to pay attention to when using THF is storage.
As the evil chemist points out in his comments on contact with light and air, explosive peroxide may form.
Be sure to put it in a closed brown glass bottle away from the light.
If you are worried about peroxide, you may consider buying the peroxide test strip.
Do not evaporate or distill it (
Especially in closed systems)
Unless you have tested it.
Make sure to work in a well ventilated area and there is nothing nearby that could cause a fire.
In general, as you can see above, you have to decide whether a smooth part is worth taking risks.
As stated in the last step, I started looking for alternatives after THF was classified as suspicious cancer.
I have seen a few web pages that say that nesroform is very effective for the smooth operation of the PLA, but since it is illegal as a private purchase in most countries, it\'s like being classified as \"H351\" I would recommend not to use it because it\'s suspected to cause cancer and it\'s \"H331: inhaled toxic \".
So I started using acetate and found it worked really well.
It is usually used in glue and nail polish detergent.
That\'s why nail polish works well in other instructions.
Like THF, ethyl is a highly flammable liquid.
It also produces slight irritation to the eyes and airway, showing that the central nervous system is disturbed (Anesthesia effect)
And damage the lungs at high concentrations.
So make sure you have good ventilation in the work area.
The steam/air mixture is heavier than the air.
Adequate ventilation must be ensured in the floor area.
Use protective gloves.
I used Ding glue.
It will be eaten directly through latex or Ding Qing gloves, so these are not enough.
Also wear eye protection.
There are two different ways to smooth with solvent.
Personally, most of the time I just wipe the parts with a cloth.
Even if I plan to use the starter book later, I do so often.
As you can see in the picture, the PLA will start to stick to the fabric, so use a cheap fabric that you don\'t mind throwing away (e. g. these).
You can use Q-
Tips for areas that are more difficult to reach.
You have to use some stress in order to get a good result.
Just add a small amount of solvent to the fabric and wipe the parts with it.
After drying, add more solvents and start again.
Using a solvent is faster than triggering and sanding, but in order for it to work properly, the parts must be very smooth from the beginning.
I have not succeeded in smoothing the PLA with acetate vapor so far, but I decided to share my findings here.
The steam pressure of ethanol is 9.
7 kPa at 20 °c, which means that at 20 °c (68°F)
About 10% of the gas phase is composed of acetate.
You can see the visualization of steam pressure in the first picture.
During the test, my store temperature was around 15 °c and even leaving a few hours of prints in steam didn\'t work.
If you use acetone (
This works well for ABS but sadly not for most PLA brands)
At 20 °c, about 25% of the gas phase already consists of it.
In order to achieve a higher concentration, you must either raise the temperature or reduce the pressure.
As you can see in the second picture, I decided to start by raising the temperature.
I tried a different temperature between 40 °c (104°F)to 60°C (140°F)
And placed in the steam for two hours.
Unfortunately, there is no effect.
As you can see in the third picture, before the top starts to smooth, the base bottom starts to deform.
The next thing I try is to relieve stress.
In this case, ethanol begins to dissolve the container (
You can see it turned white in the fourth picture)
Although it is considered to be made of polyethylene.
I have no further experiments at this point, but please let me know your findings if you have a better vacuum chamber.
I never thought about using epoxy before XTC 3D started selling.
So I decided to give it a try.
I like to work with it, but unfortunately it is really expensive in Germany.
I tested it further and found that any other epoxy can work as well.
Please read all safety instructions before using epoxy!
Hardening agent of XTC-
For example, 3D is marked as \"H361: a child suspected of harming fertility or an unborn child \".
That\'s another reason why I\'m using different brands now.
Be sure to wear Ding nitrile gloves when using epoxy!
Harmful substances like ethylenoxide can spread through latex gloves and you absolutely don\'t want them on your skin!
Also, be sure to wear safety goggles.
The epoxy resin consists of two parts: an unreactive epoxy resin and a hardened or curing agent.
You have to mix these two ingredients together.
The correct proportions depend on the epoxy you use, so be sure to read the instructions.
The curing time of the epoxy resin you use is also different.
Either way epoxy always ensures full mixing.
Paint brushes can be cleaned with acetone but are messy so I recommend using a disposable brush.
I like to brush with foam (e. g.
They will be cheaper if you buy them in bigger bags).
Sadly, Q-in my experience-
Tips don\'t work very well.
After a bit of trial and error, I found that the disposable lip brush worked very well (e. g. these).
All you have to do is carefully apply the epoxy to a thin layer on 3D printing.
Like painting, I stick it to my handle with blu tack.
Let the epoxy cure for at least 24 hours.
Once dry, you can keep it as it is, polish it, or apply a layer of epoxy.
This reaction is to release heat, which means that heat is generated.
Especially in your mixing cup.
Therefore, do not use very narrow, high containers, otherwise it may lead to a reaction that is out of control.
This also means that due to the heat generated by epoxy in the Cup, the curing speed will be faster than that on the model.
So please don\'t touch the model just because the epoxy is cured in your cup.
Personally, I am not a big fan of polishing epoxy.
If I really want the perfect finish and since I usually always paint my parts, I usually apply a layer of epoxy and then let it dry and use the fill primer as the second layer.
Tip: After seeing the instructions and already having a sand blasting machine, I decided to give it a try.
For sandblasting, I use a mixture of silica and alumina as a sandblasting abrasive with a particle size of 0. 2 to 0.
Pressure of 5mm and 8 bars (116 psi).
To be honest, I rarely use sand blasting to smooth 3D printing, because although it works, it mainly makes the part look smoother because it becomes matte, but, if you paint after that, you can see that the lines are still visible.
Also, as you can see, if you have a lighter part, you should not use the same mixture as me because it will stain the part.
Still, if you have a part that is deeply indented, like the one shown in the third picture, it works very well.
Custom message
Related Products